範例 2:使用 Arduino 製作按鈕裝置
我們將以 Arduino 製作一個按鈕裝置,當 Arduino 偵測到按鈕被按下時,會傳送按鈕被按下的資訊給 FlagO! 主控端。
Arduino 端材料
Arduino UNO 板 (安裝好 ZigBee 無線模組與 ArduComm 擴充板)
10K 電阻
常開式按壓開關
Arduino 端線路
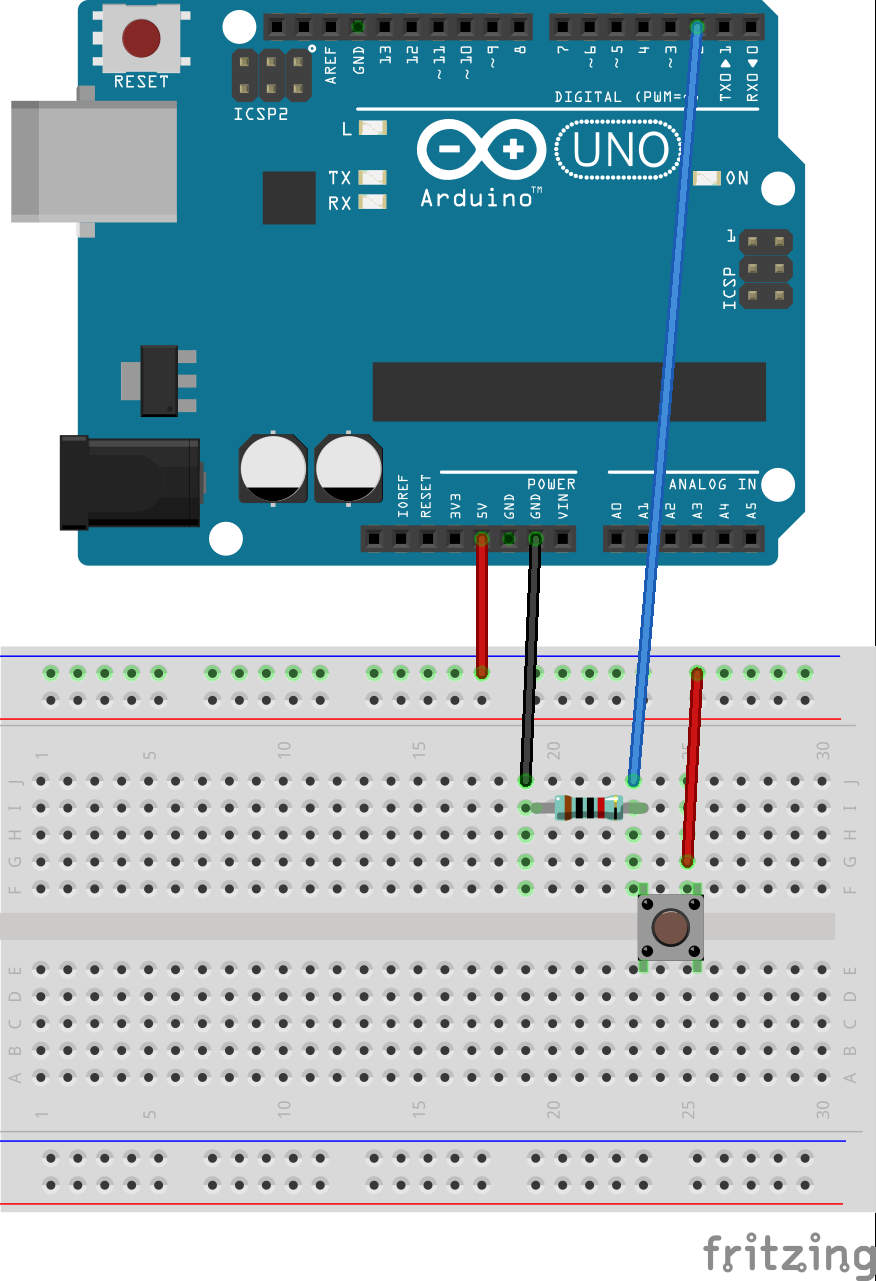
Arduino 端程式
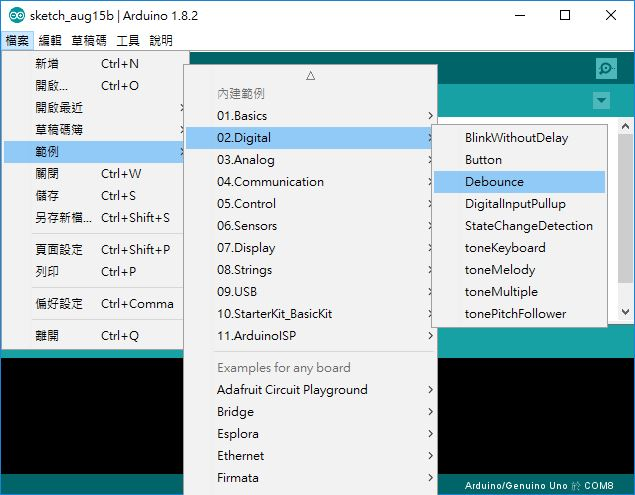
請開啟 Arduino IDE 如下載入內建範例 『02.Digital/Debounce』:
載入範例後請按 [Ctrl] + [Shift] + [S] 另外儲存為新專案,然後如下依照中文註解的說明,新增 9 行程式碼:
#include <SoftwareSerial.h> // ←引入 SoftwareSerial.h
#include <FlagZigBee.h>     // ←引入 FlagZigBee.h
#include <Flago.h>          // ←引入 Flago.h

// constants won't change. They're used here to
// set pin numbers:
const int buttonPin = 2; // the number of the pushbutton pin
const int ledPin = 13; // the number of the LED pin

// Variables will change:
int ledState = HIGH; // the current state of the output pin
int buttonState; // the current reading from the input pin
int lastButtonState = LOW; // the previous reading from the input pin

// the following variables are unsigned long's because the time, measured in miliseconds,
// will quickly become a bigger number than can be stored in an int.
unsigned long lastDebounceTime = 0; // the last time the output pin was toggled
unsigned long debounceDelay = 50; // the debounce time; increase if the output flickers

int buttonCounter = 0;       // ←新增此變數,紀錄按鈕被按下的次數

void setup() {
  pinMode(buttonPin, INPUT);
  pinMode(ledPin, OUTPUT);

  // set initial LED state
  digitalWrite(ledPin, ledState);

  Flago.begin();             // ←初始化
}

void loop() {

  Flago.update();            // ←更新狀態與 FlagO! 主控端同步

  // read the state of the switch into a local variable:
  int reading = digitalRead(buttonPin);

  // check to see if you just pressed the button
  // (i.e. the input went from LOW to HIGH), and you've waited
  // long enough since the last press to ignore any noise:

  // If the switch changed, due to noise or pressing:
  if (reading != lastButtonState) {
    // reset the debouncing timer
    lastDebounceTime = millis();
  }

  if ((millis() - lastDebounceTime) > debounceDelay) {
    // whatever the reading is at, it's been there for longer
    // than the debounce delay, so take it as the actual current state:

    // if the button state has changed:
    if (reading != buttonState) {
      buttonState = reading;

      // only toggle the LED if the new button state is HIGH
      if (buttonState == HIGH) {
        ledState = !ledState;

        // ↓↓↓ 當按鈕按下時, 傳送字串給 FlagO! 主控端 ↓↓↓
        buttonCounter++;
        String str = "按鈕已被按下" + String(buttonCounter) + "次";
        Flago.sendString(str);
      }
    }
  }

  // set the LED:
  digitalWrite(ledPin, ledState);

  // save the reading. Next time through the loop,
  // it'll be the lastButtonState:
  lastButtonState = reading;
}
程式撰寫完畢後,請將程式上傳至 Arduino,確認出現上傳成功訊息,如此便完成了 Arduino 端的按鈕裝置。
FlagO! 端裝置
- FlagO! 主控模組
- 語音合成模組
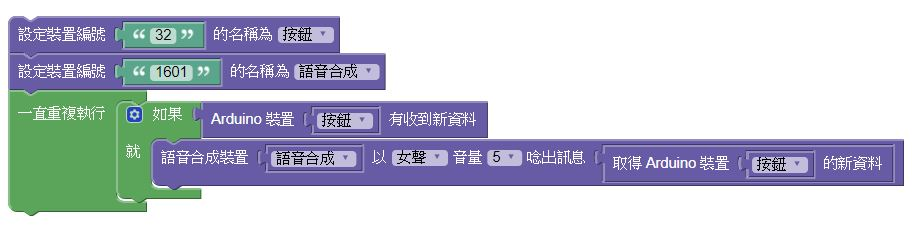
FlagO! 端積木設計
請使用瀏覽器連線 FlagO! 的積木設計環境,執行選單『專案功能/開啟舊專案』命令,然後選擇開啟產品光碟內的 Button.xml 專案,即可載入以下積木:
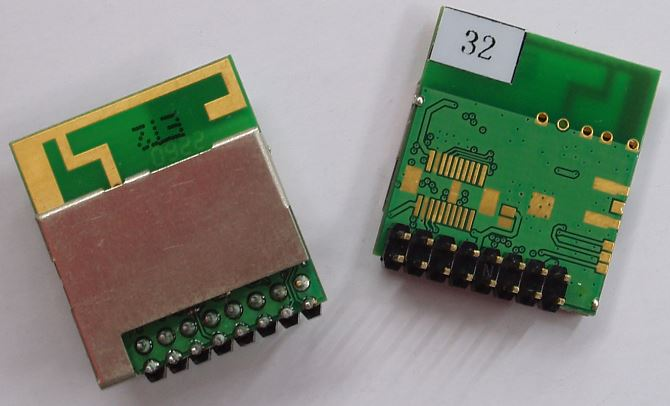
請修改積木中按鈕和語音合成的裝置編號,按鈕是用 Arduino 製作的,所以請參見 Arduino 上 ZigBee 無線模組背後的編號:
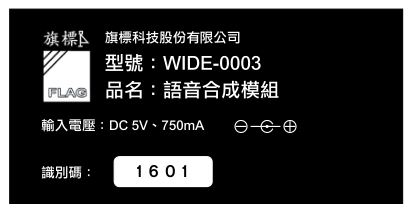
在語音合成模組的底部一樣有專屬於該裝置的識別碼以供程式辨別:
修改好按鈕和語音合成的裝置編號之後,請按左上角的執行程式鈕,讓 FlagO! 主控端開始執行程式。
FlagO! 主控端執行程式後,請按一下 Arduino 端的按鈕,即可聽到語音合成模組唸出您按下按鈕的總計次數。